Synchronize Geogig Repositories
A Geogig repository can consist of one or more layers (called FeatureTypes). You can set up Geogig repositories to synchronize changes with each other. This allows you to get updates to layers every few minutes.
You can set up repositories to sync in the map. You can set up the sync to occur automatically or only on demand. The sync configurations set up in the map will only occur when the map is open. This allows for a user to be present in case there is any conflict resolution that needs to be done. In order to set up a sync within the map, you will need to have administrator rights to set up the sync and you will need to be authenticated with the server with the remote repositories as well. You will also need to have added the layers you want to sync to the map.
Configure a Remote Repository
In order to synchronize you will need to configure the remote repository (or repositories) that Geogig will sync.
Click on the Remote Options button next to the Synchronization tab in the main menu.
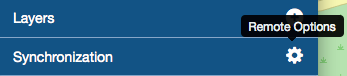
Remote Options button to configure remotes
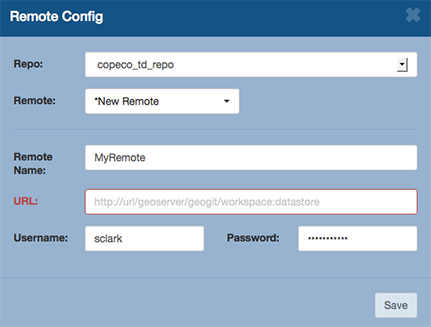
In the Remote Config window select the Geogig repo that will be synchronized. The list is populated from the repositories that correspond to the layers in the map.
Note
Even though you might only be working with a single layer, the entire repository contents will be synched. This is important to maintaining the history of the repository.

Select the repository to sync
Choose the name of the Remote from the drop down menu. If this is the remote to be set up then there will only be an option for New Remote.
Remote Configuration Settings
In the Remote Name field, enter the name you want to call the remote. Do not use spaces or special characters.
In the URL field, type in the URL to the remote. The URL will have a path with this format: http://<url>/geoserver/geogig/<workspace>:<datastore
If you do not know the workspace and datastore names you can query the server by typing the following URL in a browser. http://<servername>/geoserver/geogig

Geogig Repository List from GeoServer
You can also find the workspace and datastore information by searching through the GeoServer response to a WMS GetCapabilities request. The URL will have this format: http://<servername>/geoserver/wms?SERVICE=WMS&VERSION=1.3.0&REQUEST=GetCapabilities. Search the document for “GEOGIG_ENTRY_POINT”
GeoServer also has information about the Geogig repositories under Stores
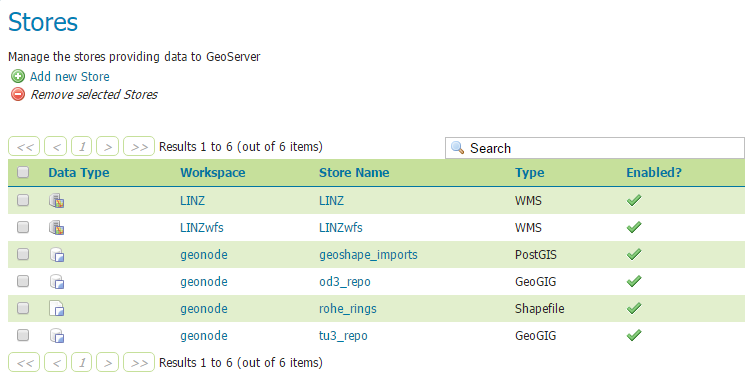
Geogig Data Stores in GeoServer
Enter the username and password for the remote server.
Click Save
Add a Sync
You can set up syncs with different branches on the same remote. The following steps explain how to add a sync to an existing remote.
To add a sync, click on Synchronization in the menu. The menu will expand.

Synchronization menu
Click on the Add Sync button
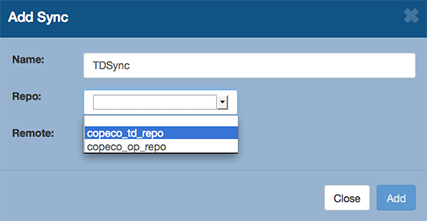
In the Add Sync window enter a name for the sync
In the Repo field select the repository from the drop down
Select the Repo
Then select the branch to sync from the drop down
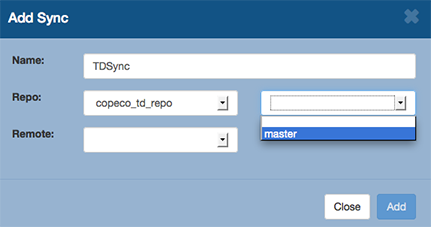
Select the Branch
Repeat the process for the Remote
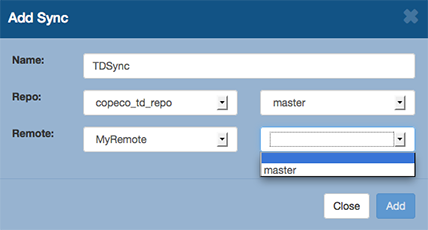
Select the Remote and Branch
Click on the Add button to complete adding the sync
Manual Sync
Once a remote is set up then you can sync between the two Geogig repositories.
Click on the up and down arrows by the name of the remote you want to sync. This initiates a one-time push/pull
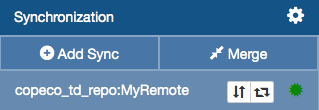
Manual Sync
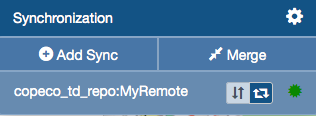
Automatic Sync
You can set up the remote to sync automatically every minute.
Click on the arrows that form a box. As long as this button is depressed, the sync will occur automatically.
Auto Sync
To toggle the automatic sync, click the button again.